Inkpad 1.4 is now available in the App Store. There are many fantastic new features to explore in this updated version. One of them is a powerful new color adjustment menu full of powerful ways to tweak and adjust colors you have applied to objects.
Below is an exercise to help you understand how the Blend commands work in the Color Adjustment menu. Click the figure to see larger version. See below the figure for a detailed breakdown of the instructions.
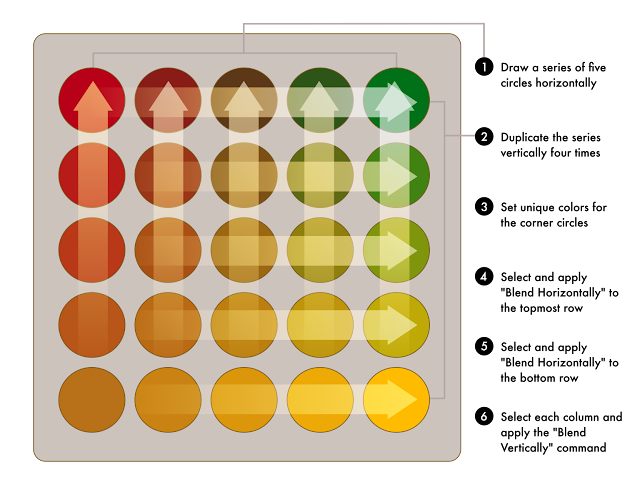 1. Draw a series of five circles horizontally
Draw a circle at the top left of your canvas. Don’t make it too large as you will be adding four additional circles to the right.
Duplicate it using Edit>Duplicate in Place. This will create a duplicate circle directly overtop the original circle.
Move the circle to the right (use graphic above as a loose guide for distance between circles).
Create three more circles by using the Edit>Duplicate and Transform Again command.
2. Duplicate the series vertically four times
Select the 5 circles.
Duplicate in place.
Move them down (using similar spacing as horizontal distance)
3. Set unique colors for the corner circles
4. Select and apply “Blend Horizontally” to the topmost row
Select all the circles in the top row.
Tap on the Color Adjustment menu and select “Blend Horizontally”
5. Select and apply “Blend Horizontally to the bottom row
Apply the same command to the bottom row
6. Select each column and apply the “Blend Vertically command
Select the column on the far left and apply Edit>Blend Vertically.
Continue the same for each of the columns.


